
Watermark 3
App details
About Watermark 3
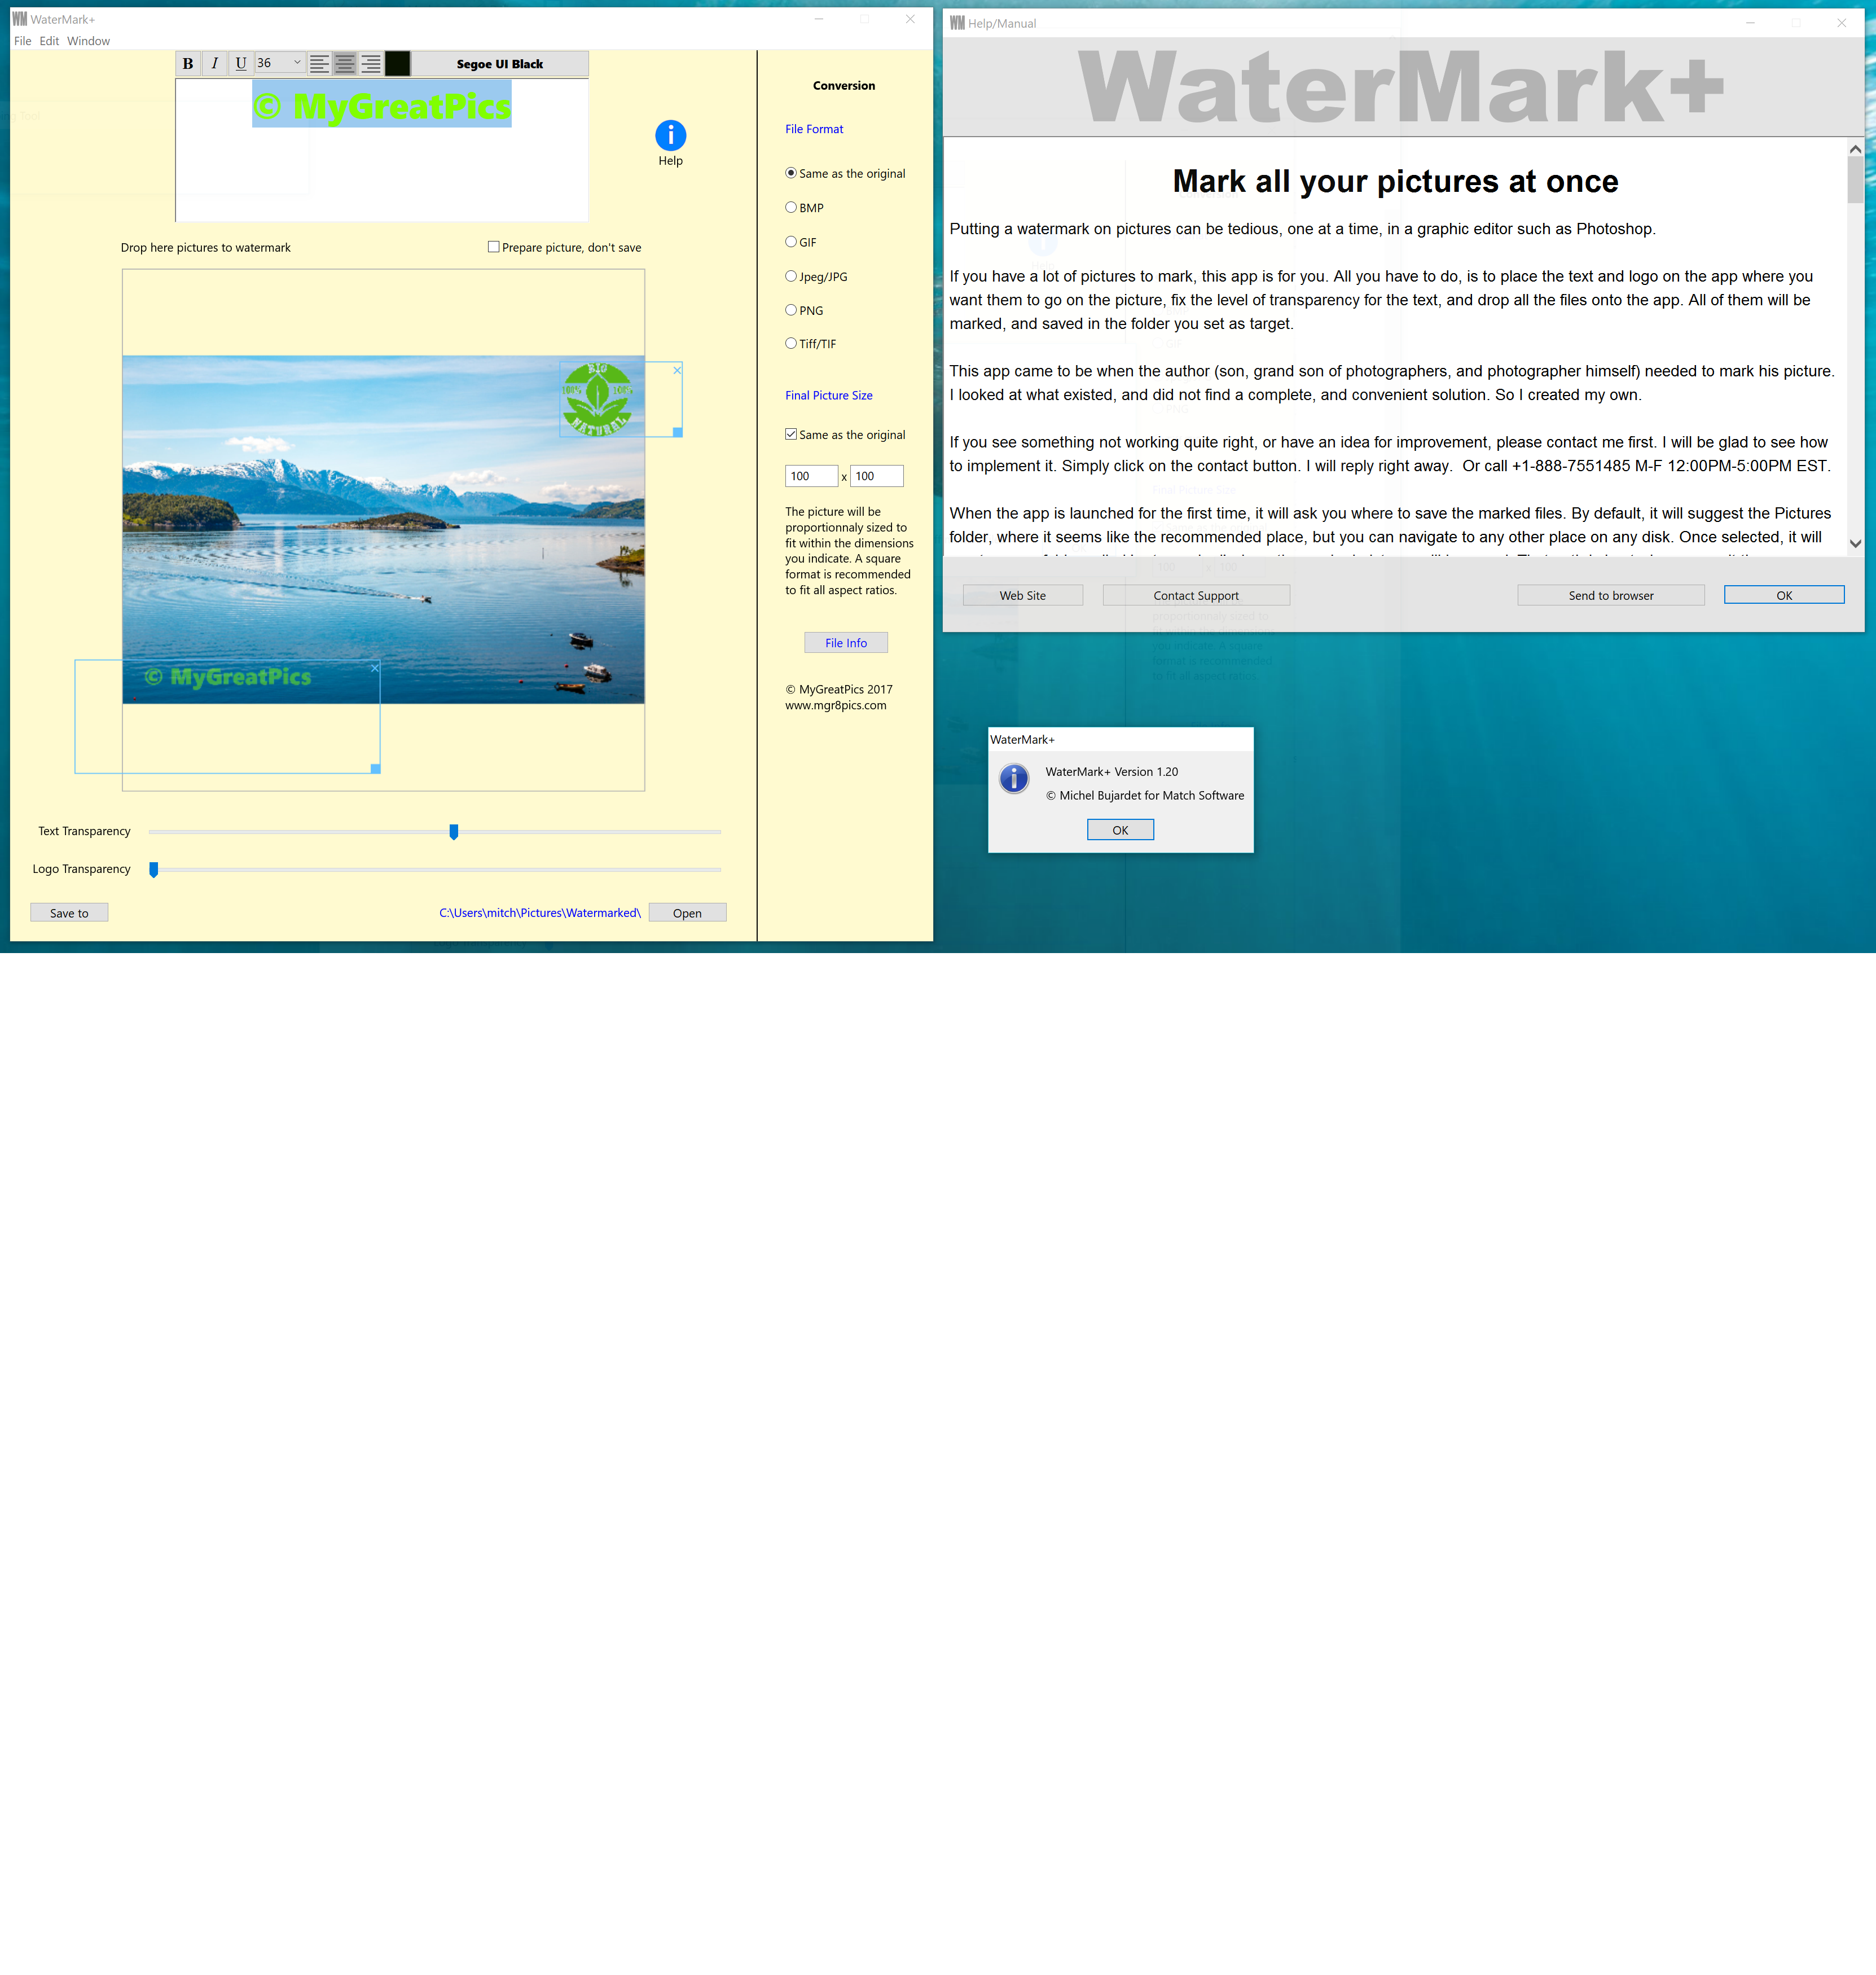
Mark all your pictures at once
Putting a watermark on pictures can be tedious, one at a time, in a graphic editor such as Photoshop.
If you have a lot of pictures to mark, this app is for you. All you have to do, is to place the text and logo on the app where you want them to go on the picture, fix the level of transparency for the text, and drop all the files onto the app. All of them will be marked, and saved in the folder you set as target.
This app came to be when the author (son, grand son of photographers, and photographer himself) needed to mark his picture. I looked at what existed, and did not find a complete, and convenient solution. So I created my own.
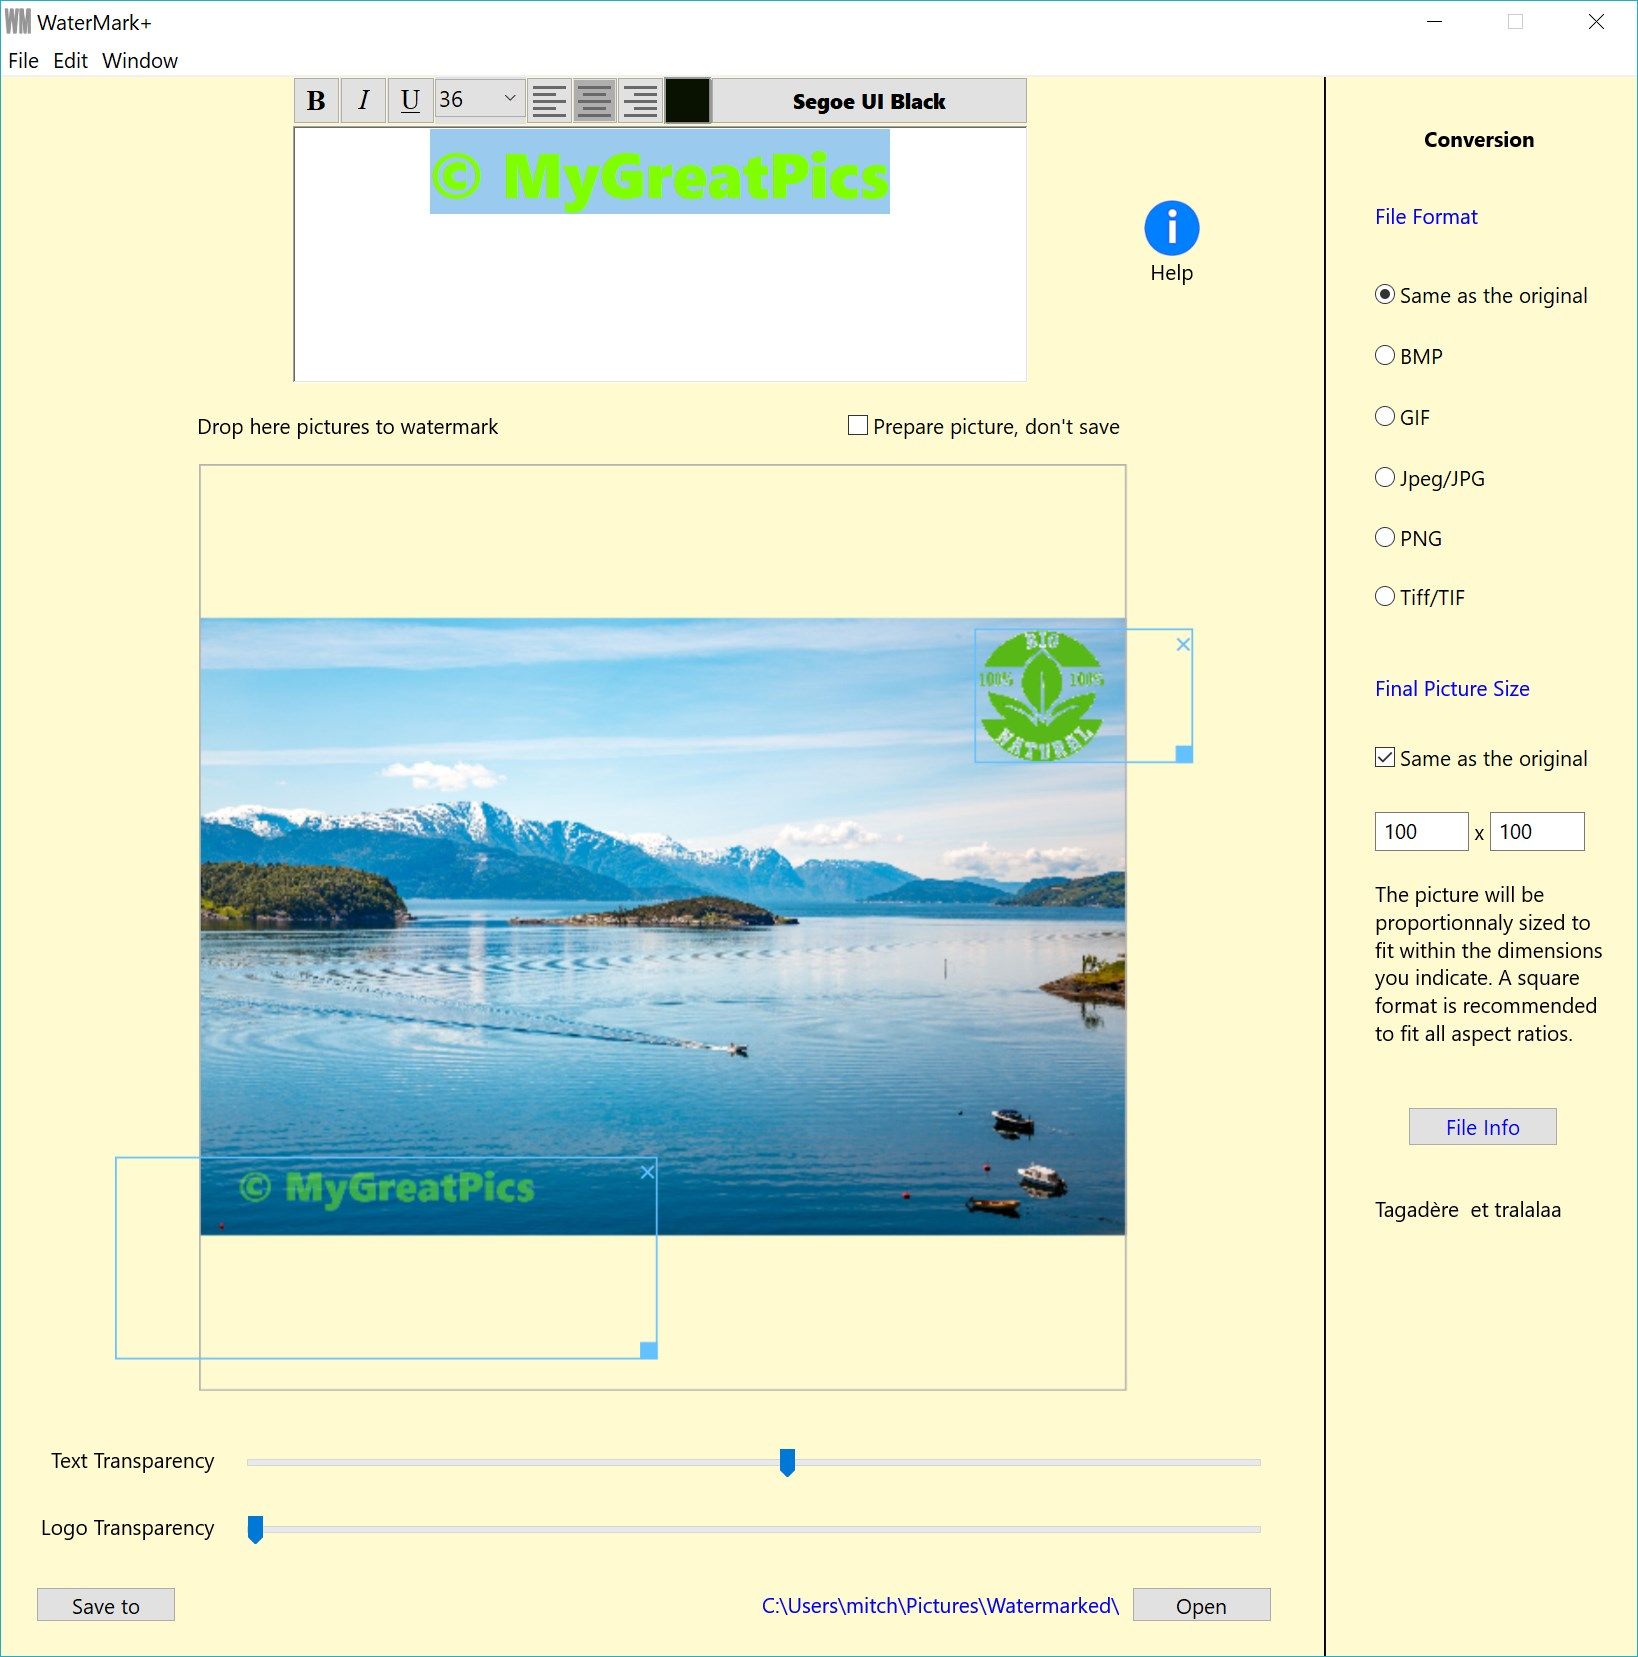
Upon launch, the app shows 4 different elements :
The text editor, where you can choose fonts as in the picture above, bold, italic, underscore, font size, and text color. That is the text that will appear in the blue box underneath, which shows how it will look on the picture. It can be move anywhere by simple drag with the mouse. You can also change its size by dragging the small blue rectangle at the lower right corner.
A small box on the upper left corner is meant to receive a logo, or any kind of picture you may want to use to mark your images. It can be move anywhere by simple drag with the mouse. You can also change its size by dragging the small blue rectangle at the lower right corner.
In the center of the window, a big grey square shows where the pictures are to be dragged, and where they will show. To prepare your layout, check “Prepare picture, don’t save”, and drag one picture over. It will help figure out the position, transparency and size of elements. When ready to mark all the pictures, uncheck the box.
Underneath that zone, an horizontal slider will let you choose the level of transparency for the text.
Another lets you chose the level of transparency for the logo.
To add a logo, simply drop it over the small square on the left hand side.
The logo has two modes : white solid, and white transparent. You can switch between the two by right clicking, and selecting the desired mode.
At the very bottom of the window, you see where the pictures will be saved. As default, it is a folder within the pictures folder, called “Watermarked”. You can select any other with “save to”. Please note that if you select the same folder as where the originals are stored, Watermark+ will not allow you to ruin your precious originals.
The Open button will open the save folder to let you see the marked images.
When the layout is to your liking, you can drag all the pictures over the big square area. They will all be marked, and saved to the folder you have selected.
Click on Open, and you will find all your marked pictures.
On the right hand side of the app, you can chose the format of the saved pictures. By default, it is the same as the original.
However, for instance to have all pictures saved as jpeg, click the corresponding radio button.
Likewise, pictures will have the same size as the original. If you want to standardize the output, you can impose maximum width and height.
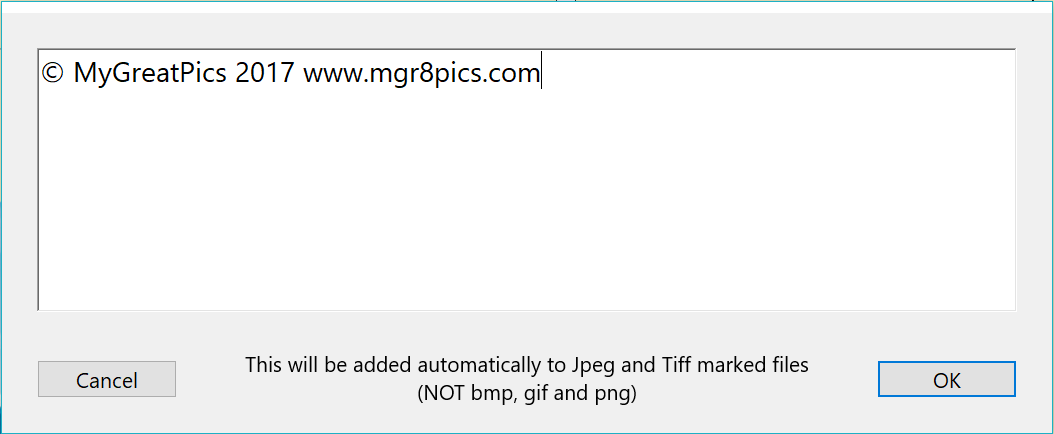
File info works with Jpeg and Tiff pictures. It lets you record a copyright message that can be read though Photoshop file information, of in through Windows Properties windows, in the details tab. Click the File Info button to access the File Info window, where you can edit the message.
Note that all settings, except the “Prepare pictures” Checkbox (which enables you to drop a picture over the app without it being saved to play with settings), are automatically saved. So when you quit the app, it will restart with the same pictures, and text, as well as position of the boxes and size.
File Info
WaterMar 3 uses a nifty utility called ExifTool created by Phil Harvey to embed copyright information in all dropped jpeg and tiff picture files, which can be read later by Adobe Photoshop. To read the copyright with Windows, right click on the file and select “Properties”. In the Properties window, click “Details”.
To modify the copyright message, select “File Info” in the File menu, or on the right of the main window. The content of the File Info is displayed underneath the File Info button, on the right hand side of the main window.
It is not possible for the moment to enter that copyright information in BMP, GIF or png. You can select jpg or tif in the Conversion radio buttons on the right of the main window so all your pictures have the info embedded.
Michel Bujardet
Key features
-
Add a watermark to as many pictures as you want in one batch
-
Add a watermark and a logo to your pictures
-
Add Exif information containing copyright in tiff or jpg pictures