
WIP Setup Developer Assistant
Rating
4.8
Reviews
4
App details
About WIP Setup Developer Assistant
The WIP setup developer assistant is an easy to use tool for developers who need to quickly set up a Windows Information Protection (WIP) environment on their local machine. Setting up this environment will allow you to validate your application’s behavior while running under WIP. For more information about WIP and how it works, please go here: https://technet.microsoft.com/itpro/windows/keep-secure/protect-enterprise-data-using-wip
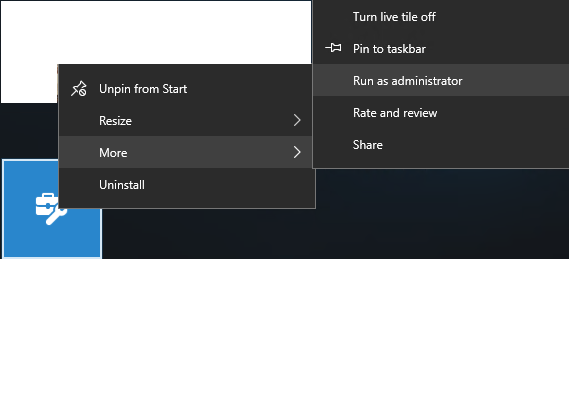
Please note: WIP setup developer assistant needs to be run as an administrator. It requires administrator access to your VM to apply WIP policy.
Instructions:
- First, install the WIP setup developer assistant on a VM. We recommend that you use a VM because it’s probably not managed by other competing protection policies. After you’ve got a VM, we recommend that you create a checkpoint on it before you run the app apply a policy.
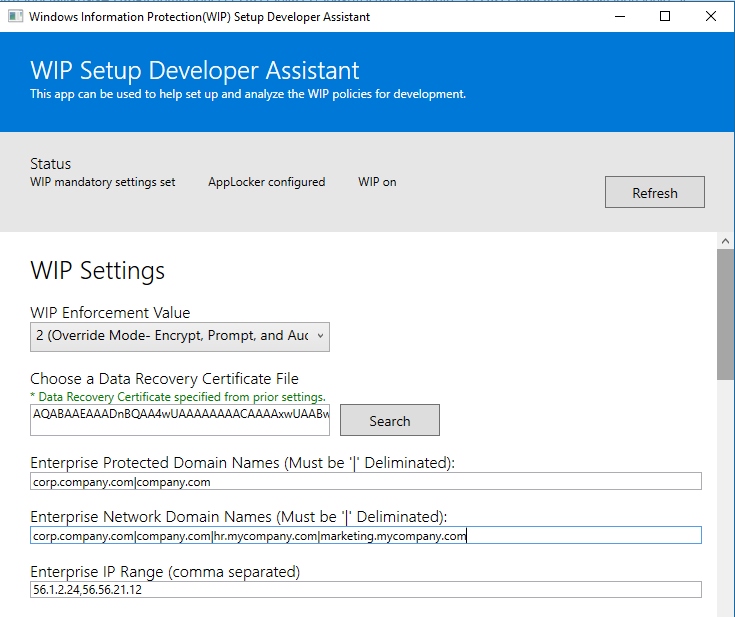
- Define your policy by adding information to each section in the WIP setup developer assistant. All sections are required except Enterprise Cloud Resources and your allowed lists of programs however, you will need to allow some applications in order to see WIP behavior. Choose the help icon (i) next to any setting to learn more about how to use it.
a. To generate a DRA certificate, open a command prompt and type this command: cipher /r: certname. certname is any name that you want to give your certificate. Respond to each prompt to give your certificate a password. After you’ve generated the certificate, you can choose it in the “Choose a Data Recovery Certificate” File setting of the WIP setup developer assistant.
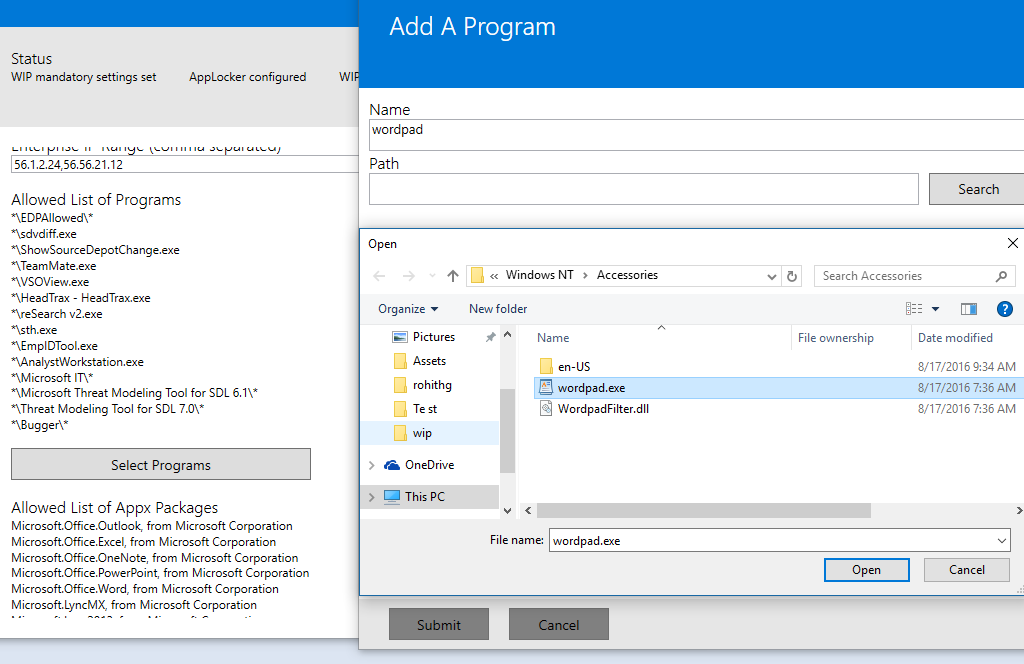
b. You’ll have to Install your desktop apps or Universal Windows Platform (UWP) apps on the VM before you can browse and add them to the policy.
c. To create an AppLocker policy for a desktop app, use the Select Programs button to point to the .exe file in the app folder structure.
d. To create an AppLocker policy for a UWP app, choose the Select Packages button to locate the package of your app. Your app appears in this list only if the UWP is already installed on the VM either from the store or side loaded. - When you’re done, choose the Apply Changes button. Confirm that you’ve successfully applied these settings in the status section of the tool.
a. Besides the status section of the tool, you can see if WIP policy is applied and working if you create a new text file on the desktop, right click on it and you will see a new item in the context menu labeled “File Ownership”. You can use this menu item to toggle ownership from work to personal and vis a versa.
Key features
-
Supports updating all Windows Information Protection(WIP) mandatory policies.